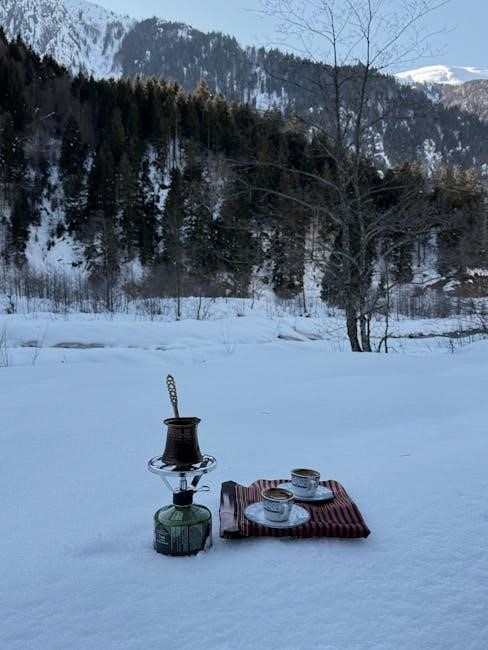
Bialetti’s iconic design‚ invented in Italy‚ delivers a unique coffee experience‚ reminiscent of New York City’s bold flavors.
It’s a beloved brewing method‚ offering a strong‚ concentrated brew.
Daughter Cafe & Wine Bar co-owner Adam Keita appreciates the moka pot’s ability to capture a specific taste profile;
Understanding its use requires following simple instructions for optimal results;
What is a Bialetti Moka Pot?
The Bialetti Moka Pot is a stovetop espresso maker‚ celebrated for its simplicity and the rich‚ robust coffee it produces. It’s an Italian staple‚ designed by Alfonso Bialetti‚ and remains incredibly popular today. Unlike drip coffee or French press‚ it utilizes pressure to brew coffee‚ resulting in a concentrated‚ espresso-like beverage;
Essentially‚ it’s a metal pot with three chambers. Following instructions carefully‚ water in the bottom chamber is heated‚ creating steam pressure that forces the water through ground coffee in the middle chamber‚ and finally‚ into the upper chamber as brewed coffee. It’s a manual process‚ offering control over the brewing parameters.
History of the Bialetti
Alfonso Bialetti patented the Moka Express in 1933‚ revolutionizing home coffee brewing in Italy. Before this‚ coffee was primarily enjoyed in cafes. Bialetti’s design offered a convenient way to create café-quality coffee at home‚ quickly gaining popularity. The iconic octagonal shape‚ now synonymous with the brand‚ was introduced later‚ improving stability and heat distribution.
Early instructions emphasized proper assembly and heat control. The Moka Pot became a symbol of Italian culture‚ spreading globally. Today‚ Bialetti continues to refine its designs‚ but the core principle – using steam pressure for a rich brew – remains unchanged‚ a testament to its enduring legacy.
Why Choose a Moka Pot?
A Moka Pot offers a unique brewing experience‚ delivering a strong‚ espresso-like coffee without the need for expensive equipment. It’s a cost-effective alternative to espresso machines‚ providing a concentrated brew perfect for those who enjoy robust flavors. Following simple instructions ensures a consistently delicious result.
Its portability and durability make it ideal for travel or small kitchens. Unlike drip coffee‚ the Moka Pot extracts more oils‚ resulting in a fuller-bodied cup. It’s a classic method‚ celebrated for its simplicity and ability to create a truly satisfying coffee ritual.
Understanding the Parts of Your Moka Pot
Bialetti pots consist of three main chambers: the boiler‚ filter basket‚ and collecting chamber. Correct assembly‚ following instructions‚ is crucial for proper brewing and safety.
The Bottom Chamber (Boiler)
The bottom chamber‚ also known as the boiler‚ holds the water that creates the steam pressure for brewing; Instructions emphasize filling it with water up to the safety valve‚ but not exceeding it.
Using filtered water is recommended for the best flavor. Ensure the water level doesn’t cover the valve; this is vital for pressure regulation. Never compress the lid tightly when filling‚ allowing for safe steam release. This chamber heats directly on the stovetop‚ transferring heat to brew delicious coffee.
The Filter Basket
The filter basket holds your ground coffee‚ crucial for the brewing process. Instructions dictate filling it loosely – do not tamp the coffee down‚ as this restricts water flow. A level‚ but not compressed‚ fill is ideal.
Ensure the basket is fully inserted into the bottom chamber before assembly. The basket’s perforations allow pressurized hot water to extract flavor. Different grind sizes impact extraction; experimentation is encouraged. Removing the funnel before first use is a standard preparation step.
The Collecting Chamber (Upper Chamber)
The collecting chamber‚ or upper chamber‚ receives the brewed coffee from the filter basket. Instructions emphasize careful handling as this part heats up during brewing. It’s vital to ensure a tight seal with the bottom chamber to maintain pressure.
Avoid opening the upper chamber while brewing; this can cause scalding. Once brewing is complete‚ allow the pot to cool slightly before disassembly. The chamber’s design collects the rich‚ concentrated coffee‚ ready for immediate enjoyment.
The Gasket and Filter Plate
Instructions highlight the importance of the gasket‚ a rubber seal ensuring a tight closure between chambers. Regularly inspect and replace the gasket to maintain pressure and prevent leaks. The filter plate sits within the filter basket‚ supporting the coffee grounds.
Ensure the filter plate is clean and free of obstructions for proper water flow. These components are crucial for a successful brew. Proper maintenance‚ as per Bialetti guidelines‚ extends the lifespan and performance of your moka pot.
First-Time Use and Seasoning
Instructions advise disassembling and thoroughly cleaning your Bialetti before initial use. This removes any manufacturing residue. Seasoning isn’t strictly required‚ but recommended for longevity.
Disassembling and Cleaning Before First Use
Instructions emphasize a crucial first step: completely disassemble your new Bialetti moka pot. Carefully unscrew the upper (collecting) chamber from the base (boiler). Remove the filter basket and the filter plate‚ along with the gasket.
Wash each component individually with warm water – avoid using soap‚ as it can leave a residue affecting the coffee’s flavor. Ensure all parts are thoroughly rinsed to eliminate any potential manufacturing oils or metal shavings. This initial cleaning prepares the moka pot for optimal performance and a purer coffee experience.
The Seasoning Process
Instructions suggest “seasoning” your Bialetti moka pot to enhance its longevity and flavor profile. After the initial cleaning‚ reassemble the pot without coffee grounds. Fill the bottom chamber with water up to the safety valve.
Brew a full pot of water‚ allowing it to cycle through as you normally would with coffee. Discard the brewed water and repeat this process one or two more times. This helps create a protective layer‚ preventing oxidation and ensuring a cleaner‚ more consistent taste in future brews.

Brewing with Your Bialetti: A Step-by-Step Guide
Instructions detail a simple process: grind coffee‚ fill the bottom chamber with water‚ add grounds to the basket‚ and assemble the pot.
Success relies on precise execution!
Grinding Your Coffee
Instructions emphasize the importance of the coffee grind for optimal moka pot brewing. Avoid extremely fine espresso grinds‚ as they can clog the filter.
A medium-fine grind‚ slightly coarser than espresso‚ is generally recommended. Experimentation is key; varying grind sizes impacts extraction.
Too coarse a grind results in weak coffee‚ while too fine leads to bitterness.
Consider starting with a medium-fine setting and adjusting based on your taste preferences.
Consistent grinding ensures even extraction and a balanced cup. Pre-ground coffee can be used‚ but freshly ground beans are always superior.
Filling the Bottom Chamber with Water
Instructions dictate filling the bottom chamber (boiler) with water before adding coffee. Use pre-filtered water for the best flavor‚ avoiding tap water’s potential impurities. Fill to just below the safety valve – never cover it!
This valve is crucial for pressure regulation during brewing.
Using hot water can slightly reduce brewing time and prevent a metallic taste‚ though cold water works perfectly well. Do not exceed the valve’s level; overfilling can cause dangerous pressure buildup. Ensure the water level is accurate for a proper extraction.
Adding Coffee to the Filter Basket
Instructions emphasize filling the filter basket with ground coffee‚ but do not tamp it down! Gently level the grounds; tamping creates too much resistance‚ hindering extraction. A medium-fine grind is generally recommended for moka pots‚ similar to espresso but slightly coarser.
For a 6-cup moka pot‚ weigh approximately 15 grams of coffee. Partially filling the basket‚ and experimenting with ratios‚ can refine your brew. Avoid overfilling‚ as this also impedes water flow. Ensure even distribution for consistent results.
Assembling the Moka Pot
Instructions dictate carefully screwing the upper chamber (collecting chamber) onto the base (boiler). Ensure a tight seal to maintain pressure during brewing. Hand-tighten firmly‚ but avoid excessive force‚ which could damage the gasket. The handle should be cool to the touch before handling.
Before placing on the heat‚ double-check that the filter basket is correctly inserted into the boiler. Proper alignment is crucial for preventing leaks. Remember to remove any stray coffee grounds from the rim to ensure a secure seal.

The Brewing Process
Instructions emphasize using a low to medium heat source. Monitor closely‚ as the coffee will brew when pressure builds. Avoid high heat‚ which can cause a bitter taste.
The process involves recognizing distinct brewing stages‚ from initial drips to a sputtering sound indicating completion.
Heat Source Considerations (Stovetop vs. Induction)
Instructions for Bialetti moka pots often specify stovetop use‚ but compatibility varies with induction cooktops. Traditional moka pots are aluminum and won’t work directly on induction.
However‚ induction-compatible versions‚ often with a stainless steel base‚ are available. When using a gas or electric stovetop‚ employ medium-low heat. This prevents overheating and ensures a smoother extraction.
For induction‚ start with a medium setting and adjust as needed.
Consistent‚ moderate heat is crucial for optimal brewing‚ regardless of the source. Avoid high heat‚ as it can scorch the coffee and impart a bitter flavor.
Monitoring the Brewing Process
Following instructions closely‚ observe the moka pot carefully during brewing. Initially‚ you’ll hear a gentle bubbling as the water heats. Soon‚ coffee will begin to emerge into the upper chamber‚ starting slowly and then increasing in flow.
Listen for a gurgling sound; this indicates the brewing is nearing completion. As the flow becomes lighter and more sputtering‚ remove the moka pot from the heat immediately.
This prevents over-extraction and bitterness. Careful monitoring ensures a flavorful‚ balanced cup. Don’t leave the pot unattended‚ as it heats up quickly.
Recognizing the Brewing Stages
Understanding the brewing stages‚ guided by instructions‚ is key to a perfect moka pot coffee. The first stage begins with quiet bubbling‚ signaling water is heating and building pressure. Next‚ coffee slowly emerges‚ a rich‚ dark stream filling the upper chamber.
The middle stage features a steady flow‚ producing the bulk of your brew. Finally‚ a lighter‚ sputtering phase indicates depletion of water and nearing completion.
Recognizing these stages allows you to control the extraction‚ preventing bitterness from over-extraction. Prompt removal from heat is crucial.
Post-Brewing and Cleaning
Following instructions‚ cool the moka pot before disassembly. Thorough cleaning after each use prevents buildup and ensures longevity. Proper storage is also essential!
Cooling Down the Moka Pot
Instructions emphasize the importance of allowing your Bialetti moka pot to cool down naturally after brewing. Avoid immediately running it under cold water‚ as this thermal shock can potentially warp the aluminum.
Instead‚ let it sit on the stovetop for a few minutes‚ or carefully move it to a heat-resistant surface. This gradual cooling prevents damage and makes disassembly safer‚ reducing the risk of burns. Remember‚ a hot moka pot requires careful handling to avoid accidents!
Disassembling and Cleaning After Use
Instructions dictate that once cooled‚ carefully disassemble your Bialetti. Discard the spent coffee grounds and rinse all parts – the bottom chamber‚ filter basket‚ and collecting chamber – with warm water. Avoid using soap‚ as it can impart unwanted flavors.
Ensure the gasket and filter plate are also cleaned thoroughly. Dry all components completely before reassembling to prevent corrosion. Regular cleaning maintains optimal performance and extends the lifespan of your moka pot‚ ensuring consistently delicious coffee.
Proper Storage
Instructions recommend storing your Bialetti Moka Pot disassembled and completely dry to prevent corrosion and maintain its longevity. Avoid storing it assembled‚ as trapped moisture can lead to mold or a metallic taste in future brews.
Keep all parts in a cool‚ dry place‚ away from direct sunlight. Periodically check the gasket for wear and tear. Proper storage ensures your moka pot remains in excellent condition‚ ready to deliver rich‚ flavorful coffee whenever you desire.
Troubleshooting Common Issues
Instructions often address issues like bitter coffee‚ weak brews‚ or leaks. The safety valve releasing pressure is normal‚ but persistent problems require attention and adjustment.
Coffee is Bitter
Instructions for avoiding bitter coffee often center around grind size and heat control. A grind that is too fine can lead to over-extraction‚ resulting in a harsh‚ bitter taste. Experiment with a coarser grind to see if it improves the flavor profile.
Additionally‚ excessive heat can scorch the coffee grounds. Reduce the heat to medium-low and monitor the brewing process closely. Ensure you aren’t letting the moka pot overheat‚ as this contributes to bitterness. Following these instructions will help you achieve a smoother‚ more enjoyable cup.
Coffee is Weak
If your moka pot coffee lacks strength‚ several instructions can help rectify the issue; Begin by ensuring you’re using a sufficient amount of coffee grounds in the filter basket – don’t pack it too tightly‚ but ensure it’s adequately filled. A finer grind can also increase extraction‚ leading to a bolder flavor.
Furthermore‚ verify the water level in the bottom chamber reaches just below the safety valve. Insufficient water will result in a weak brew. Following these instructions carefully should yield a more robust and satisfying coffee experience.
Moka Pot is Leaking
If your Bialetti moka pot is leaking during brewing‚ carefully review these instructions. First‚ ensure the gasket is properly seated and in good condition; a worn gasket is a common culprit. Second‚ avoid overfilling the bottom chamber with water – always stay below the safety valve.
Also‚ confirm the filter basket is securely screwed into the bottom chamber. Finally‚ don’t disassemble the pot while it’s still pressurized. Following these instructions will minimize leaks and ensure a safe brewing process.
The Safety Valve is Releasing Pressure
If the safety valve on your Bialetti moka pot is releasing pressure during brewing‚ follow these instructions carefully. This usually indicates an obstruction or over-pressurization. Ensure the filter basket isn’t packed too tightly with coffee grounds‚ allowing water to flow freely.
Avoid using excessive heat‚ as this can create too much pressure. Always stay below the safety valve when filling the bottom chamber with water. Following these instructions ensures safe operation and prevents potential hazards.
Advanced Techniques
Experiment with coffee-to-water ratios and grind sizes‚ following these instructions‚ to fine-tune extraction; Control heat levels for optimal flavor‚ adjusting to your preference.
Adjusting Coffee-to-Water Ratio
Instructions for adjusting the coffee-to-water ratio are crucial for dialing in your perfect moka pot brew. A standard ratio isn’t fixed; experimentation is key! Some users begin with 15 grams of coffee to 100 grams of water‚ partially filling the basket.
Increasing the coffee amount intensifies the flavor‚ creating a bolder‚ more concentrated shot. Conversely‚ reducing the coffee yields a lighter‚ more nuanced brew. Tighter or looser ratios impact the final result‚ so meticulous adjustments are recommended. Keep detailed notes of your changes to replicate successful brews!
Experimenting with Grind Size
Instructions regarding grind size are vital for moka pot success. It’s not as simple as “fine” or “coarse.” A grind slightly finer than drip coffee‚ but coarser than espresso‚ is a good starting point. Adjusting this impacts extraction significantly.
A finer grind increases resistance‚ potentially leading to over-extraction and bitterness. A coarser grind reduces resistance‚ possibly resulting in under-extraction and weak coffee. Experimentation is key; small adjustments can dramatically alter the flavor profile. Record your grind settings alongside your coffee-to-water ratios!
Controlling the Heat for Optimal Extraction
Instructions emphasize heat control as crucial for a balanced brew. Begin with medium-low heat; a rapid boil can scorch the coffee‚ leading to bitterness. The goal is a slow‚ steady extraction‚ allowing the water to gently permeate the grounds.
Reducing the heat after the initial brewing starts can further refine the flavor. Monitor the color of the coffee stream – a dark‚ almost syrupy flow indicates optimal extraction. Avoid high heat‚ as it compromises the delicate aromas and flavors. Patience yields the best results!
Moka Pot Maintenance
Instructions detail regular cleaning and part replacement. Replace the gasket periodically‚ and keep the filter plate clear of obstructions for optimal performance and longevity.
Descaling removes mineral buildup‚ ensuring consistent brewing. Proper care extends the life of your Bialetti!
Replacing the Gasket
Instructions for gasket replacement are straightforward‚ ensuring a tight seal for proper brewing. Over time‚ the rubber gasket wears out‚ leading to leaks or reduced pressure. Carefully remove the old gasket from the upper chamber‚ typically by gently prying it out.
Clean the groove thoroughly before inserting a new gasket of the correct size. Ensure it sits flush and evenly within the chamber. A properly fitted gasket is crucial for maintaining the Moka pot’s performance and preventing dangerous pressure buildup during brewing. Regular inspection and timely replacement are key!
Cleaning the Filter Plate
Instructions for cleaning the filter plate are vital for maintaining coffee quality and preventing clogs; After each use‚ disassemble the Moka pot and remove the filter plate. Rinse it thoroughly under warm water‚ removing all coffee grounds. A soft brush can help dislodge stubborn particles from the small holes.
Avoid using abrasive cleaners or scouring pads‚ as these can damage the metal. Ensure all grounds are removed to allow for proper water flow during subsequent brews. A clean filter plate guarantees optimal extraction and a delicious cup of coffee.
Descaling the Moka Pot
Instructions for descaling your Bialetti are crucial for longevity and consistent brewing. Mineral buildup from water can affect performance. Fill the bottom chamber with a 50/50 solution of water and white vinegar. Run this through a brewing cycle without coffee grounds.
Follow with two full cycles of fresh water to rinse away any residual vinegar taste. Repeat this process every few months‚ depending on water hardness. Regular descaling ensures optimal heat distribution and prevents corrosion‚ preserving your Moka pot’s quality.

Bialetti Sizes and Choosing the Right One
Instructions suggest selecting a size based on your needs; understand cup sizes vary. A 6-cup pot doesn’t yield six standard cups of coffee‚ consider this!
Understanding Moka Pot Cup Sizes
Instructions often refer to Moka Pot sizes using “cup” measurements‚ which can be misleading. These “cups” are espresso-sized‚ approximately 1.5-2 ounces each‚ significantly smaller than a standard 8-ounce coffee cup.
A 1-cup Moka Pot brews roughly 2 ounces‚ a 3-cup brews about 6 ounces‚ a 6-cup yields around 12 ounces‚ and a 9-cup produces approximately 18 ounces.
Therefore‚ when choosing a size‚ consider how many espresso-style servings you desire‚ not traditional coffee mugs. Carefully review product descriptions and brewing instructions to avoid confusion.
Selecting a Size Based on Your Needs
Following instructions carefully‚ consider your typical coffee consumption when choosing a Moka Pot size. If you primarily drink espresso-style coffee alone‚ a 1 or 3-cup model is ideal. For two people‚ a 6-cup pot offers a convenient amount.
Larger households or those who enjoy multiple brews throughout the day might benefit from a 9-cup version. Remember‚ you can always brew a smaller amount in a larger pot‚ but brewing larger amounts in a small pot is impossible.
Prioritize your routine and preferred serving size when interpreting brewing instructions.
Safety Precautions
Always adhere to instructions; avoid overfilling the Moka Pot. Handle hot surfaces with care‚ and ensure the safety valve functions correctly for safe operation.
Avoiding Overfilling
Instructions emphasize the critical importance of not overfilling your Bialetti Moka Pot. The water level in the bottom chamber should never exceed the safety valve. Overfilling can lead to dangerously high pressure during brewing‚ potentially causing leaks or even a malfunction.
Similarly‚ avoid tamping the coffee grounds too tightly into the filter basket. A gentle leveling is sufficient; excessive compression restricts water flow and increases pressure. Always follow the manufacturer’s guidelines regarding fill levels for your specific Moka Pot size to ensure safe and optimal brewing.
Handling Hot Surfaces
Instructions consistently warn users about the extremely high temperatures reached during and immediately after brewing with a Bialetti Moka Pot. The pot’s metal components – including the body‚ handle‚ and lid – become intensely hot. Always use oven mitts or a thick towel when handling the Moka Pot to prevent severe burns.
Exercise caution when disassembling the pot after brewing‚ allowing sufficient time for it to cool down. Avoid touching any part of the Moka Pot with bare hands until it has completely cooled. Prioritize safety to enjoy your coffee without incident.
Proper Valve Function
Instructions emphasize the importance of the safety valve in your Bialetti Moka Pot. This valve regulates pressure during brewing‚ preventing dangerous build-up. It’s normal for the valve to release a small amount of steam during the process; this indicates proper function.
However‚ excessive or continuous release suggests grounds are blocking the filter or the pot is overfilled. Never attempt to block or tamper with the valve. A functioning valve is crucial for safe operation‚ ensuring a delightful brewing experience without risk.