
Graco Benton 5-in-1 Convertible Crib: Assembly Instructions
Embark on assembling your Graco Benton 5-in-1 Convertible Crib! This guide will take you through each step‚ from identifying parts to finally converting the crib․ With clear instructions‚ constructing a safe and stylish sleeping space for your child is simple․ Let’s begin the building process!
The Graco Benton 5-in-1 Convertible Crib is a versatile and long-lasting piece of furniture designed to grow with your child․ This convertible crib transitions from a standard crib to a toddler bed‚ a daybed‚ and finally‚ a full-size bed‚ making it a popular choice among parents․ Recognized for its safety‚ durability‚ and stylish design‚ the Benton crib is a valuable investment for your child’s nursery․
This assembly guide provides simple‚ step-by-step instructions to ensure a smooth and safe setup․ Before you begin‚ carefully review the parts list and hardware identification to familiarize yourself with all components․ Adult assembly is required‚ and it is essential to keep small parts away from children to avoid choking hazards prior to assembly․
The Graco Benton crib is designed with ease of assembly in mind‚ allowing you to create a comfortable and secure environment for your baby․ By following these instructions‚ you can confidently build a crib that will adapt to your child’s changing needs for years to come․
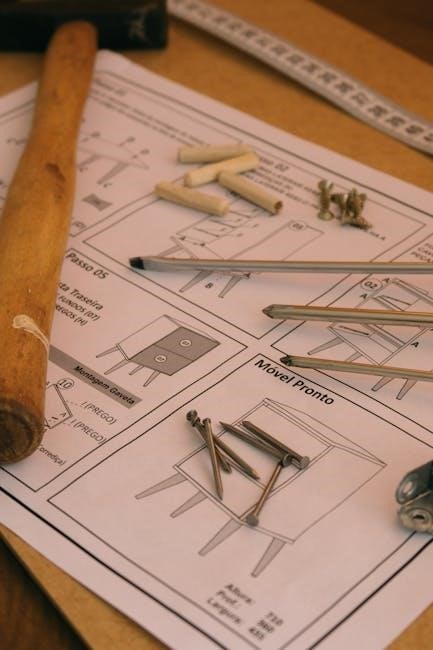
Parts List and Hardware Identification
Before commencing the assembly of your Graco Benton 5-in-1 Convertible Crib‚ it is crucial to familiarize yourself with all the components․ Ensure you have all the necessary parts by cross-referencing them with the provided parts list․ This step is essential to prevent any delays or complications during the assembly process․
The main components typically include the crib ends (top)‚ side rails‚ mattress support‚ and any additional parts for conversion․ Hardware items such as bolts‚ screws‚ dowels‚ and Allen wrenches are also critical․ Sort and identify each hardware piece to ensure you use the correct ones for each step․ Refer to the hardware diagram in your manual for accurate identification․
Missing or incorrect parts can hinder the assembly‚ so double-check everything before you begin․ If any parts are missing or damaged‚ contact customer support for assistance․ Taking the time to organize and identify all the parts and hardware will streamline the assembly process and ensure a sturdy and safe crib for your little one․
Tools Required for Assembly
To ensure a smooth and efficient assembly of your Graco Benton 5-in-1 Convertible Crib‚ gathering the necessary tools beforehand is essential․ Having the right tools will not only speed up the process but also help prevent damage to the crib’s components during assembly․
Typically‚ you will need a Phillips head screwdriver to tighten screws and bolts securely․ A flathead screwdriver might also be useful for certain steps․ An Allen wrench‚ often included with the crib‚ is necessary for specific bolts․ A rubber mallet can assist in gently tapping pieces into place without causing damage․
Additionally‚ consider having a level to ensure the crib is perfectly balanced‚ which is crucial for safety․ A measuring tape can be handy for verifying dimensions and alignment․ Having these tools readily available will streamline the assembly process‚ making it easier to build a safe and sturdy crib for your child․ Remember to consult the assembly manual for any specific tool recommendations․

Step-by-Step Assembly Guide
Follow this comprehensive guide to assemble your Graco Benton 5-in-1 Convertible Crib․ Each step is detailed for ease‚ ensuring a secure and proper build․ From attaching the crib ends to installing the mattress support‚ we’ll guide you through the entire process smoothly․
Attaching the Crib Ends
Begin the assembly process by carefully attaching the crib ends․ First‚ identify the two crib end pieces‚ ensuring you have the top and bottom oriented correctly according to the parts list․ Locate the pre-drilled holes on both the crib ends and the side rails‚ which are crucial for proper alignment and secure fastening․
Insert the provided wood dowels into the designated holes on the crib ends; These dowels serve as guides and add stability to the structure․ Next‚ align the side rails with the crib ends‚ matching the dowel locations for a snug fit․ Insert the bolts through the side rails into the threaded inserts on the crib ends․
Use the Allen wrench or screwdriver specified in the tools list to tighten the bolts․ Ensure the bolts are tightened evenly to avoid warping or instability․ Do not overtighten‚ as this could damage the wood or strip the threads․ Repeat this process for both crib ends‚ ensuring they are securely attached to the side rails․
Double-check that all connections are firm and that the crib ends are aligned correctly․ This step is crucial for the overall stability and safety of the crib․ If any adjustments are needed‚ loosen the bolts slightly and realign before tightening again․ Proceed to the next step only when you are satisfied with the attachment of the crib ends․
Installing the Mattress Support
Now‚ focus on installing the mattress support‚ a critical component for ensuring your baby’s safety and comfort․ Identify the mattress support frame and the hardware required for its installation‚ usually including support brackets and screws․
Locate the pre-determined slots or ledges inside the crib ends where the mattress support will rest․ The Graco Benton crib typically offers multiple height settings to accommodate your growing child․ Choose the appropriate height setting based on your baby’s age and development․ For newborns‚ the highest setting is generally recommended for easier access․
Attach the support brackets to the crib ends at the chosen height level using the provided screws․ Ensure the brackets are securely fastened and aligned correctly․ Carefully place the mattress support frame onto the brackets‚ making sure it sits evenly on all sides․
Test the stability of the mattress support by applying gentle pressure․ It should feel firm and secure without any wobbling or shifting․ If necessary‚ adjust the brackets or screws to ensure a stable and level surface․ Once you are satisfied with the installation‚ double-check that there are no gaps between the mattress support and the crib frame to prevent any safety hazards․ Proceed to the next step‚ knowing your mattress support is properly installed․
Assembling the Drawer (If Applicable)
If your Graco Benton 5-in-1 Convertible Crib includes a drawer‚ this section will guide you through its assembly․ First‚ unpack all drawer components and identify each part using the parts list․ Typically‚ you’ll have the drawer front‚ back‚ sides‚ and bottom panel‚ along with screws and hardware․
Begin by attaching the drawer sides to the drawer front․ Align the edges and use the provided screws to secure them tightly․ Next‚ attach the drawer back to the sides‚ ensuring a snug fit․ Once the frame is assembled‚ slide the drawer bottom panel into the designated grooves or slots․ Secure it with screws or nails‚ if necessary․
Check that all connections are sturdy and that the drawer is square․ If the drawer includes handles or knobs‚ attach them now‚ following the manufacturer’s instructions․ Gently slide the assembled drawer into the opening beneath the crib; Ensure it moves smoothly and aligns properly․ If there are any issues‚ double-check the assembly and adjust as needed․
Test the drawer by opening and closing it several times to ensure it functions correctly․ With the drawer now assembled and installed‚ you can store essential baby items conveniently․ This added storage enhances the functionality of your Graco Benton crib․

Converting the Crib
As your child grows‚ the Graco Benton 5-in-1 Convertible Crib adapts․ Transitioning from crib to toddler bed‚ daybed‚ and full-size bed is possible․ Follow the instructions carefully to ensure safety and proper conversion․ Each stage offers new functionality for your growing child’s needs․
Transitioning to a Toddler Bed
Once your child is ready‚ transitioning the Graco Benton crib into a toddler bed is a straightforward process․ This conversion allows your little one to experience a sense of independence while still providing a secure and familiar sleeping environment․ Before you begin‚ ensure your child meets the recommended age and weight requirements specified in the crib’s manual․
The primary step involves removing one of the crib’s sides and replacing it with a toddler guard rail․ This guard rail‚ often sold separately‚ helps prevent your child from accidentally rolling out of bed during the night․ It’s crucial to use the correct guard rail designed specifically for the Graco Benton model to ensure proper fit and safety․
Carefully detach the existing crib side by unscrewing the bolts or fasteners that secure it to the crib’s frame․ Store these parts in a safe place‚ as you may need them later for future conversions․ Next‚ attach the toddler guard rail using the appropriate hardware and following the manufacturer’s instructions meticulously․ Double-check that all connections are secure and that the guard rail is firmly in place․
After converting the crib‚ inspect it thoroughly to identify any potential hazards‚ such as loose screws or sharp edges․ Address these issues promptly to maintain a safe sleeping environment․ Now‚ your child can enjoy the comfort and security of their “new” toddler bed!
Converting to a Daybed
Transforming your Graco Benton crib into a charming daybed offers a versatile seating and lounging option for your growing child․ This conversion extends the life of your crib‚ providing a cozy spot for reading‚ playing‚ or simply relaxing during the daytime․ The daybed configuration retains the crib’s back panel and side rails while removing one of the longer sides‚ creating an open and inviting space․
To convert the crib‚ start by detaching the side rail that you wish to remove․ Typically‚ this involves unscrewing the bolts or fasteners that connect the rail to the headboard and footboard․ Ensure you keep all the hardware safely stored‚ as you may need it for future conversions back to a crib or other bed configurations․
Once the side rail is removed‚ you may need to make adjustments to the mattress support․ Depending on the model‚ you might lower the mattress to a suitable height for a daybed‚ making it easier for your child to climb in and out․ Refer to the crib’s instruction manual for specific guidance on adjusting the mattress support․
After completing the conversion‚ inspect the daybed thoroughly for any sharp edges or loose parts․ Tighten all connections and ensure the structure is stable and secure․ Add some pillows and a cozy blanket to create a comfortable and inviting daybed that your child will love․
Full-Size Bed Conversion (If Applicable)
If your Graco Benton 5-in-1 Convertible Crib offers the full-size bed conversion‚ you’re in luck! This feature allows you to extend the life of the crib well into your child’s adolescent years‚ providing a familiar and comfortable sleeping space as they grow․ Converting to a full-size bed typically requires a conversion kit‚ which may be sold separately․ This kit usually includes side rails and sometimes additional support pieces to accommodate the larger mattress․
Before beginning‚ ensure you have the correct conversion kit for your specific Graco Benton model․ Consult your crib’s instruction manual for details on the required kit and any specific steps․ Start by disassembling the crib completely‚ removing the mattress support‚ side rails‚ and any other components that won’t be used in the full-size bed configuration․ Keep all hardware organized‚ as you’ll need some of it for the new assembly․
Attach the new side rails from the conversion kit to the headboard and footboard of the crib․ These rails will provide the length and support needed for a full-size mattress․ Follow the instructions in the conversion kit manual carefully‚ ensuring all connections are secure and properly aligned․ You may also need to install additional support slats or a center support beam to ensure the mattress is adequately supported․
Once the frame is assembled‚ place a full-size mattress on the bed frame․ Check for any gaps or instability and make any necessary adjustments․ With the full-size conversion complete‚ your child can enjoy the familiar comfort of their Graco Benton crib for many years to come․

Safety Precautions and Maintenance
Ensuring the safety of your child is paramount when using the Graco Benton 5-in-1 Convertible Crib․ Always adhere to the manufacturer’s guidelines and safety recommendations․ Before each use‚ inspect the crib for any loose hardware‚ sharp edges‚ or signs of damage․ Tighten any loose screws or bolts immediately․ Never use the crib if any parts are broken or missing; contact Graco customer service for replacements․
Use only a crib mattress that is the correct size and thickness‚ ensuring a snug fit without gaps between the mattress and crib sides․ Avoid placing the crib near windows‚ curtains‚ or blinds with cords that could pose a strangulation hazard․ Regularly check that all sides are securely locked in place‚ especially after converting the crib to different configurations․
For maintenance‚ clean the crib regularly with a damp cloth and mild soap․ Avoid using harsh chemicals or abrasive cleaners that could damage the finish or pose a risk to your child․ Periodically inspect the mattress support to ensure it is securely attached and level․ When the crib is converted to a toddler bed or full-size bed‚ reinforce the importance of safe sleep habits to your child․
Always supervise your child when they are in or around the crib‚ especially during transitions to different configurations․ By following these safety precautions and maintenance tips‚ you can ensure that the Graco Benton 5-in-1 Convertible Crib provides a safe and comfortable sleeping environment for your child as they grow․